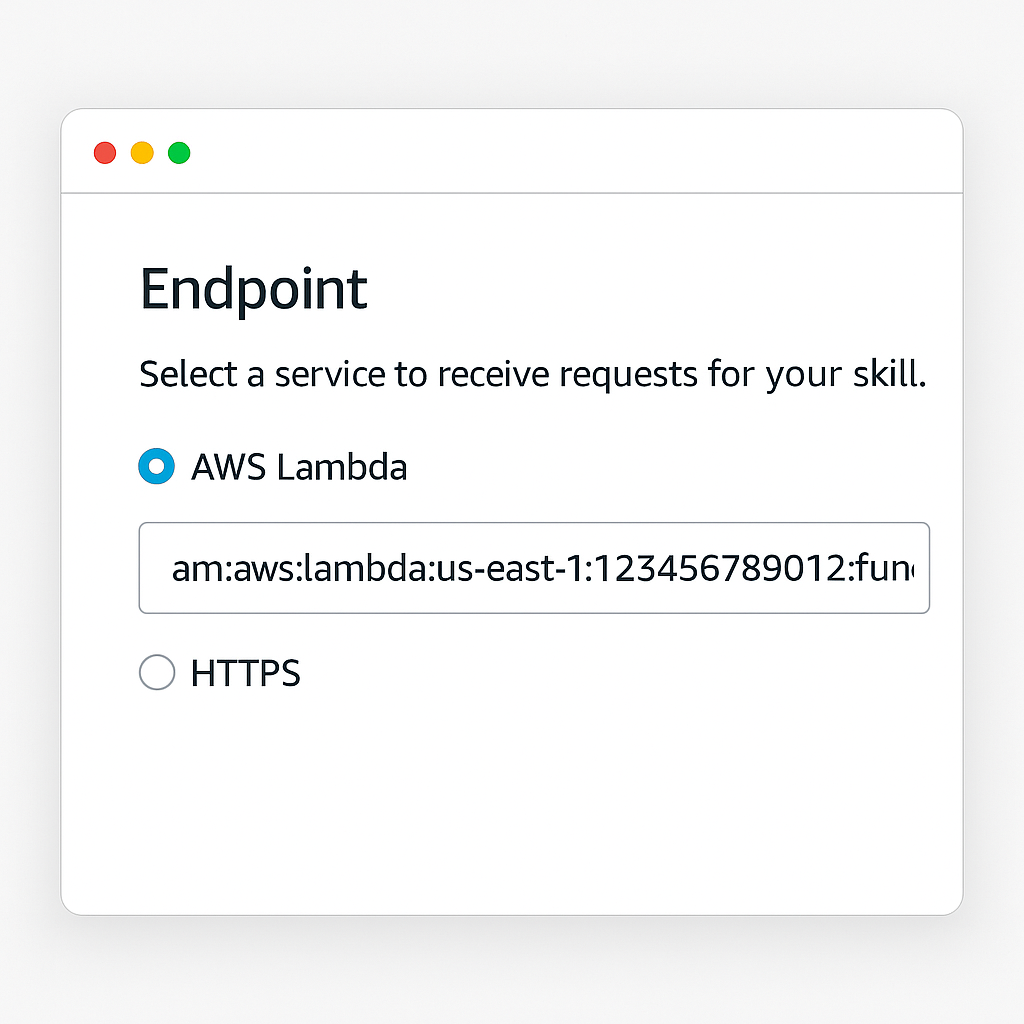
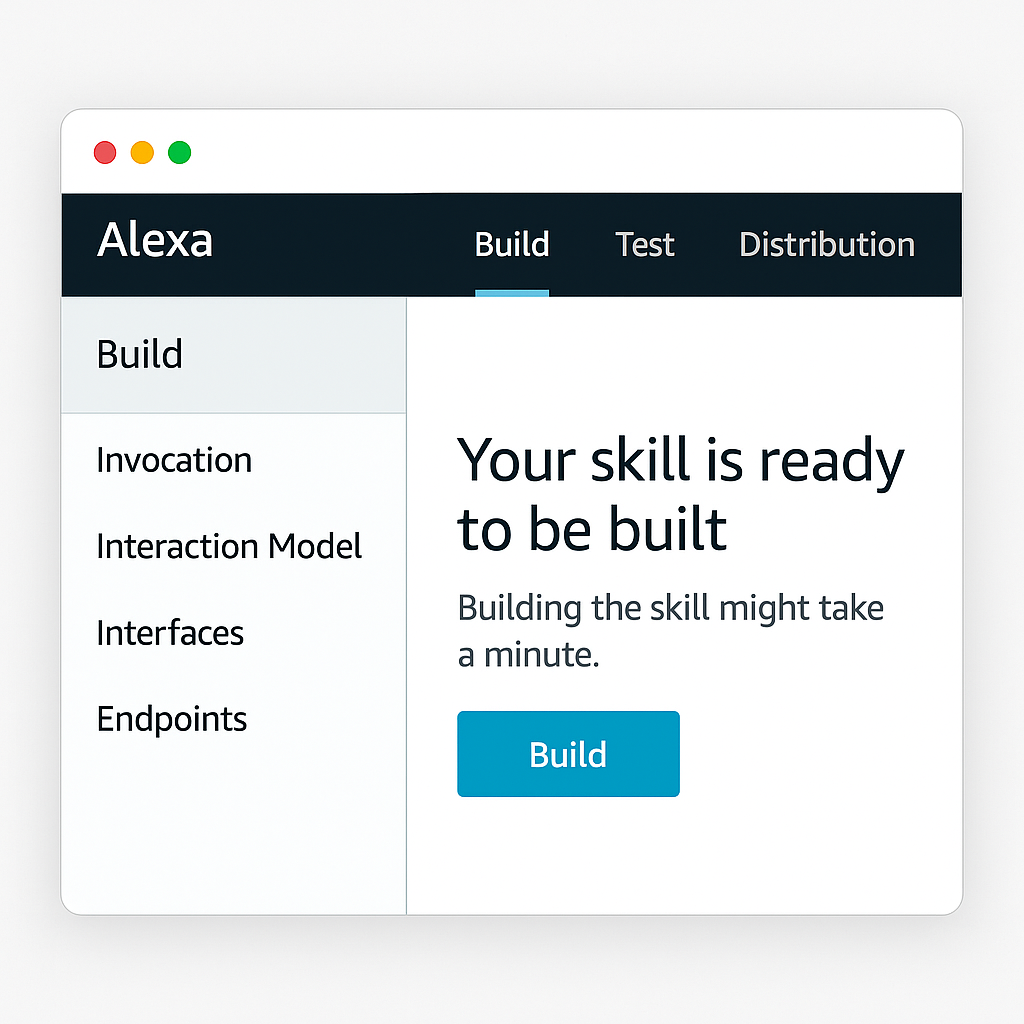
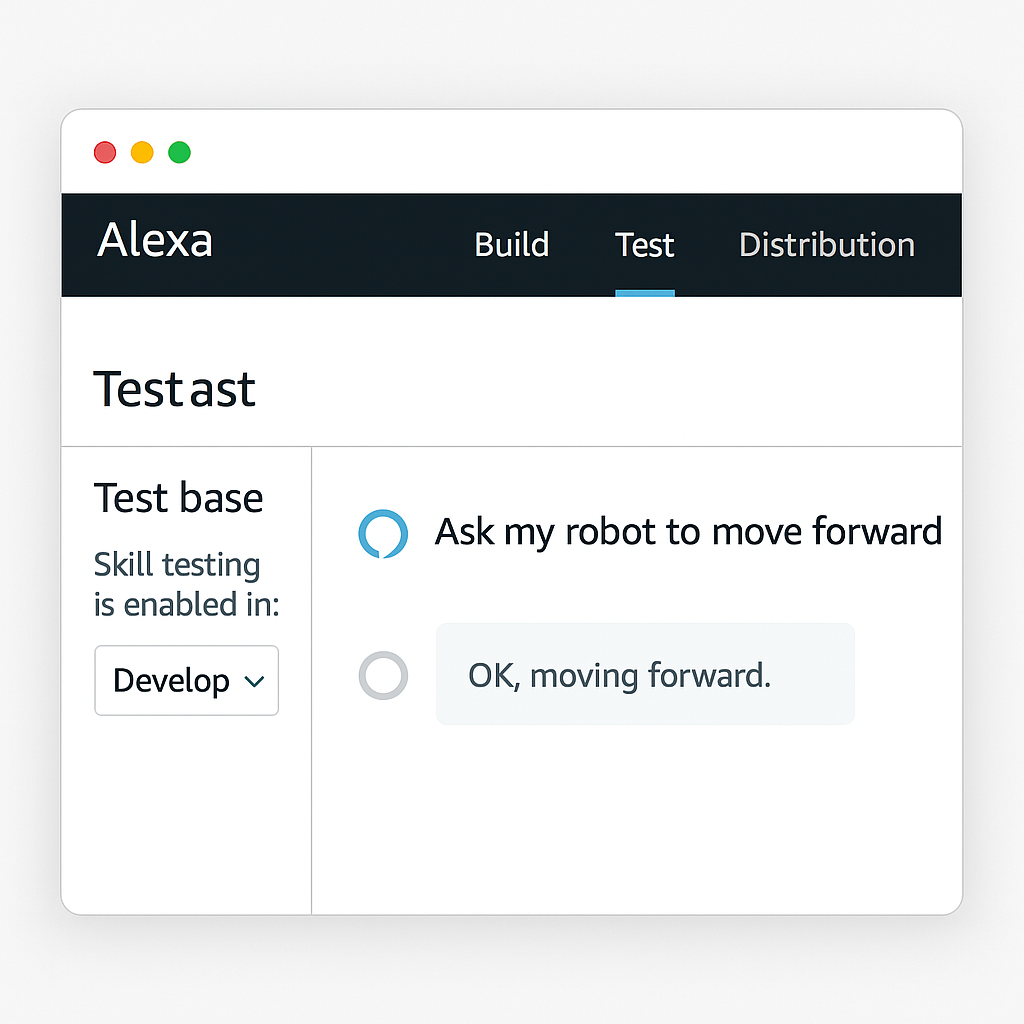
How to Develop a Custom Alexa Skill to Control Your ROS 2 Robot

👉 How to Develop a Custom Alexa Skill to Control Your ROS 2 Robot 

In this step-by-step lab, you’ll learn how to create a custom Alexa Skill from scratch that can send commands to your ROS 2 robot. We’ll use the Alexa Developer Console to define intents and invocation phrases, and configure the skill to interact with a web server hosted via ngrok. By the end of this guide, you’ll be able to trigger robot actions using voice commands through Alexa’s cloud-based system—even without a physical Alexa device. 

1. Access the Alexa Developer Console 

Start by going to the Alexa Developer Console at developer.amazon.com. Log in with your Amazon account or create a new one. 

Once logged in, click on ‘Create Skill’ to begin building your custom voice assistant skill. 

2. Create and Configure the Skill 

– Skill name: Choose a descriptive name for your skill (e.g., ‘Arduinobot’). 
– Language: Select the primary language (e.g., English or Italian). 
– Choose a model: Select ‘Custom’ to build the skill interaction model from scratch. 
– Hosting method: Choose ‘Provision your own’ so we can use ngrok to expose the skill endpoint. 
Click ‘Create skill’ and then choose ‘Start from scratch’ as the template. 

  • 3. Define the Invocation Name 

    The invocation name is the phrase users will say to activate your skill. 

    Example: Set the invocation name to ‘activate the robot’. 
    Once defined, click ‘Save Model’ to confirm. 

  • 4. Create Custom Intents 

    Now we will define the skill’s functionality using custom intents. Each intent represents a command. 

    **Intent 1 – PickIntent** 
    – Utterances: 
      • pick up this pen 
      • pick up that pen 
      • grab the pen 

    **Intent 2 – SleepIntent** 
    – Utterances: 
      • rest 
      • sleep 
      • turn off the robot 

    **Intent 3 – WakeIntent** 
    – Utterances: 
      • wake up the robot 
      • activate the robot 
      • wake up arduinobot 

    Click ‘Save Model’ after creating each intent. You can add more intents later following the same process. 

  • 5. Configure the Endpoint 

    Go to the ‘Endpoint’ section under the ‘Assets’ tab. 

    – Endpoint type: Select ‘HTTPS’ 
    – Default region URI: Temporarily enter ‘https://ngrok.io’ as a placeholder 
    – SSL certificate type: Select ‘My development endpoint is a sub-domain of a domain that has a valid certificate’ 

    Click ‘Save Endpoints’ to store this configuration. We’ll update it with the actual ngrok address later. 

  • 6. Build the Skill 

    Now it’s time to build the interaction model. 

    – Click the ‘Build Skill’ button 
    – Wait until the process completes (status: Build Complete) 

    This process generates Alexa’s internal natural language model to match user phrases with the intents you’ve defined. 

  • 7. Test the Skill 

    Go to the ‘Test’ tab in the Developer Console. 

    – Enable testing by selecting ‘Skill testing is enabled in: Development’ 
    – You can now interact with Alexa using voice or by typing 

    Example test: Click the microphone and say ‘activate the robot’. 
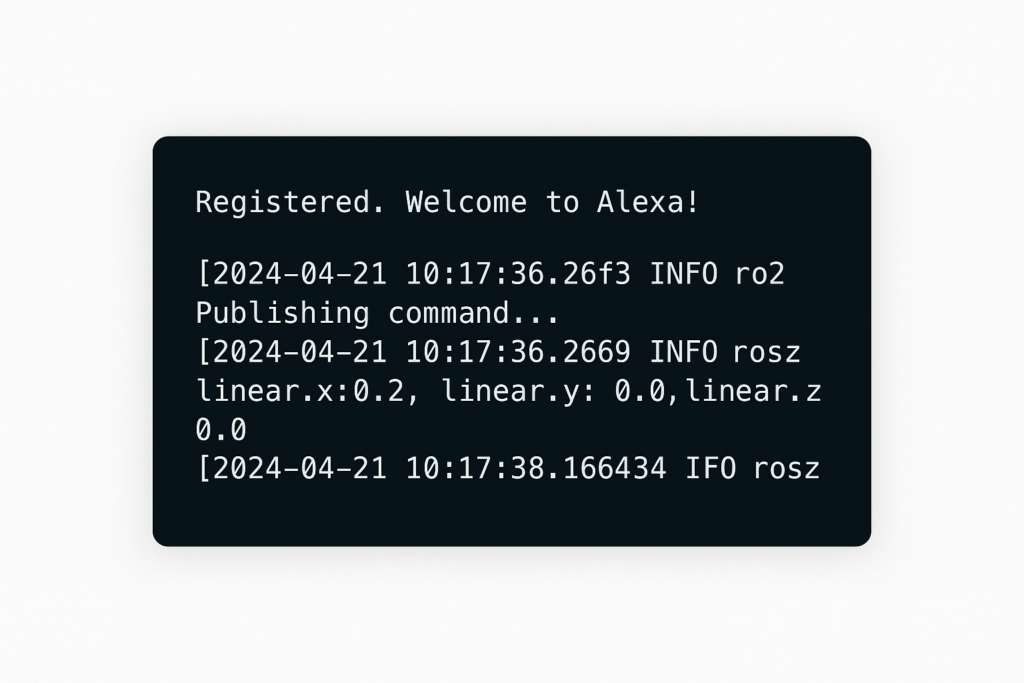
    Because we used a placeholder endpoint, Alexa won’t get a response—but you’ll see the JSON message Alexa would send. 

    This JSON includes the request type (e.g., ‘LaunchRequest’) and the intent triggered. This is crucial for building the backend server that will process these requests and trigger robot actions. 

  • 8. What Comes Next 

    In the upcoming lessons, we’ll develop the backend web server to receive Alexa’s JSON requests and link them to ROS 2 actions. 

    With the skill structure complete, you now have a working foundation for cloud-based voice interaction with your robot! 

en_US