// Define the pin connected to the potentiometer
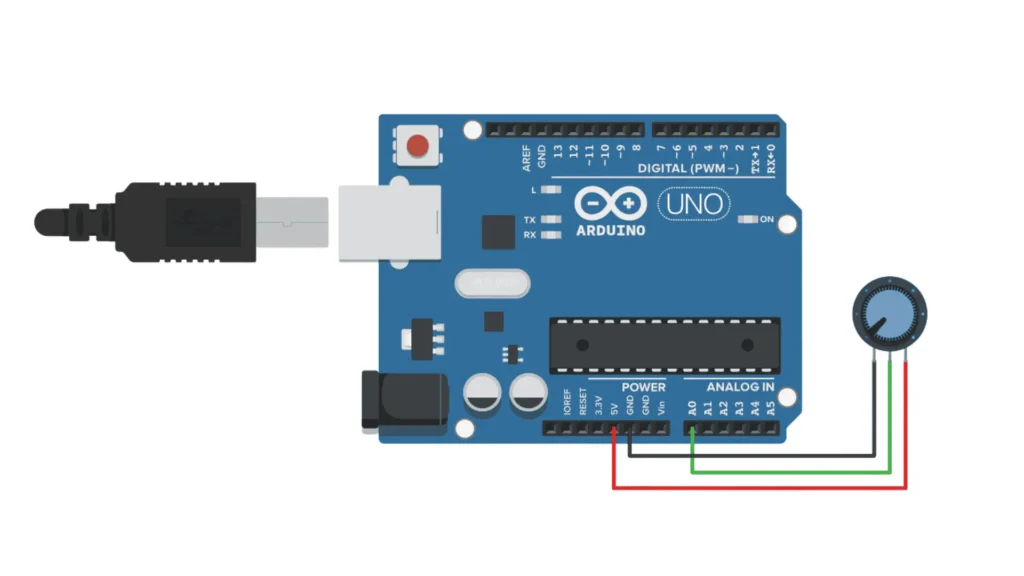
const int potPin = A0;
// Variable to store the analog reading
int potValue = 0;
void setup() {
// Initialize serial communication
Serial.begin(9600);
}
void loop() {
// Read the analog value from the potentiometer
potValue = analogRead(potPin);
// Print the value to the Serial Monitor
Serial.print("Potentiometer Value: ");
Serial.println(potValue);
// Wait 200 milliseconds before the next reading
delay(200);
}